I got many emails from my readers to write an article on uploading and reading excel files in WEB API using c#. So, today in this article I will explain how to read the data from excel files in web API as well as a way to insert that data into the database table using the entity framework.
In this tutorial, we are using Visual Studio 2019 and explaining how to create a table in an SQL server database, how to create an ADO.NET entity data model (EDM) as well as how to create a WEB API controller and a way to write an action method in the WEB API controller and a way to test the created WEB API using postman.
in my previous article, I explained how to create an Angular 11 CURD Application Using Web API With Material Design that you might like to read.
Requirement
- Create a WEB API to upload and read the excel file.
- Read excel files and insert records into database tables using entity framework.
- Test created WEB API using postman.
Implementation
In this article we will create a WEB API to store basic details of students from an excel file to a database table, So, let's prepare a sample excel file with a few dummy records of students and then will start with a database and create a new table for store records of students using SQL Server.
Step 1
Prepare Excel File
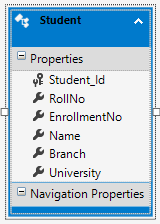
Create Table Student
CREATE TABLE [dbo].[Students](
	[Student_Id] [int] IDENTITY(1,1) NOT NULL,
	[RollNo] [int] NULL,
	[EnrollmentNo] [nvarchar](15) NULL,
	[Name] [nvarchar](50) NULL,
	[Branch] [nvarchar](50) NULL,
	[University] [nvarchar](50) NULL
	)
Step 2
Now, we have to create a WEB API to read the records of students from the excel file and insert them into the student table using an entity framework. To create web API, open visual studio 2019 >> file >> new >> project >> Select Web Application.
When you click the OK button, another window will appear on your screen for template selection where you have to select WEB API and click on the OK button.
Step 3
Now, you have to go to solution explorer and right-click on Model folder >> Add >> New Item >> select Data from the left panel >> Select ADO.NET Entity Data Model.
Now, click on the Add button and select the EF Designer from the database >> Next >> Gives your credential of SQL Server and select the database. Now, you have to click on the Add button and choose your table and click on the finish button.
If you are a beginner or need any help to add an entity data model then you can read this article where I explained how to create an ADO.NET entity data model (EDM) in asp.net step by step.
Step 4
To read the data from the excel file we have to install ExcelDataReader.DataSet library. There are many ways to read the excel file but this library provides the easiest way to read excel, so I will go with this library. To install ExcelDataReader.DataSet library go to solution explorer and right-click on the project name >> Select "Manage NuGet Packages" >> Search for ExcelDataReader.DataSet library >> Install.
Step 5
Now, we will add a new empty controller to our WEB API project to create a WEB API to perform the CURD operation. For that, you have to go to solution explorer and right-click on the Controllers folder >> Add >> Controller >> Select Web API 2 Controller-Empty >> Click on Add.
Now, you have to open our controller class and write the following APIs.
ReadExcelController.cs
using Codingvila_ReadExcel_API.Models;
using ExcelDataReader;
using System;
using System.Collections.Generic;
using System.Data;
using System.IO;
using System.Linq;
using System.Net;
using System.Net.Http;
using System.Web;
using System.Web.Http;

namespace Codingvila_ReadExcel_API.Controllers
{
    [RoutePrefix("Api/Excel")]
    public class ReadExcelController : ApiController
    {
        [Route("ReadFile")]
        [HttpPost]
        public string ReadFile()
        {
            try
            {
                #region Variable Declaration
                string message = "";
                HttpResponseMessage ResponseMessage = null;
                var httpRequest = HttpContext.Current.Request;
                DataSet dsexcelRecords = new DataSet();
                IExcelDataReader reader = null;
                HttpPostedFile Inputfile = null;
                Stream FileStream = null;
                #endregion

                #region Save Student Detail From Excel
                using (dbCodingvilaEntities objEntity = new dbCodingvilaEntities())
                {
                    if (httpRequest.Files.Count > 0)
                    {
                        Inputfile = httpRequest.Files[0];
                        FileStream = Inputfile.InputStream;

                        if (Inputfile != null && FileStream != null)
                        {
                            if (Inputfile.FileName.EndsWith(".xls"))
                                reader = ExcelReaderFactory.CreateBinaryReader(FileStream);
                            else if (Inputfile.FileName.EndsWith(".xlsx"))
                                reader = ExcelReaderFactory.CreateOpenXmlReader(FileStream);
                            else
                                message = "The file format is not supported.";

                            dsexcelRecords = reader.AsDataSet();
                            reader.Close();

                            if (dsexcelRecords != null && dsexcelRecords.Tables.Count > 0)
                            {
                                DataTable dtStudentRecords = dsexcelRecords.Tables[0];
                                for (int i = 0; i < dtStudentRecords.Rows.Count; i++)
                                {
                                    Student objStudent = new Student();
                                    objStudent.RollNo = Convert.ToInt32(dtStudentRecords.Rows[i][0]);
                                    objStudent.EnrollmentNo = Convert.ToString(dtStudentRecords.Rows[i][1]);
                                    objStudent.Name = Convert.ToString(dtStudentRecords.Rows[i][2]);
                                    objStudent.Branch = Convert.ToString(dtStudentRecords.Rows[i][3]);
                                    objStudent.University = Convert.ToString(dtStudentRecords.Rows[i][4]);
                                    objEntity.Students.Add(objStudent);
                                }

                                int output = objEntity.SaveChanges();
                                if (output > 0)
                                    message = "The Excel file has been successfully uploaded.";
                                else
                                    message = "Something Went Wrong!, The Excel file uploaded has fiald.";
                            }
                            else
                                message = "Selected file is empty.";
                        }
                        else
                            message = "Invalid File.";
                    }
                    else
                        ResponseMessage = Request.CreateResponse(HttpStatusCode.BadRequest);
                }
                return message;
                #endregion
            }
            catch (Exception)
            {
                throw;
            }
        }
    }
}
Step 7
Now, we will test the created WEB API using postman.
Open postman
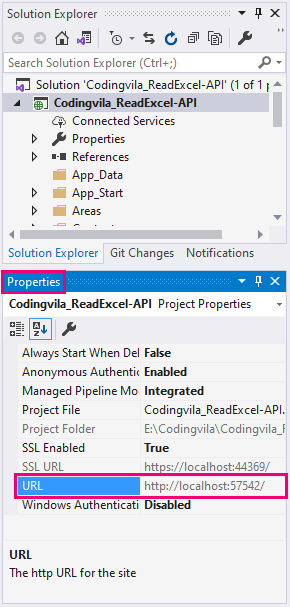
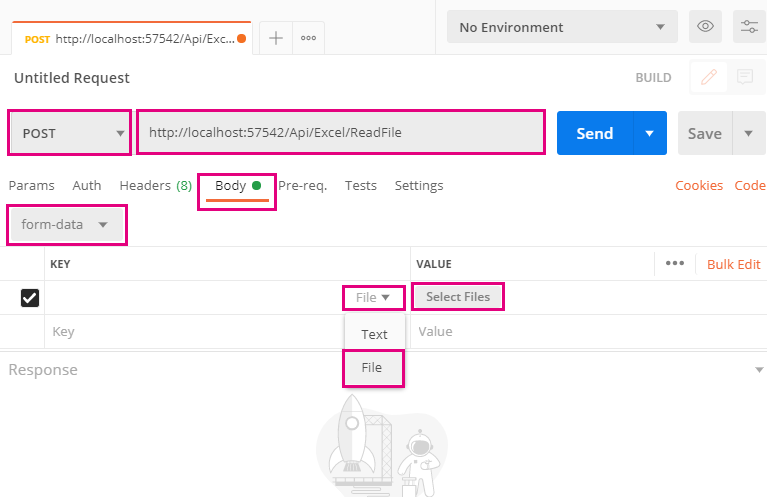
Now, you have to select the method as POST for action ReadFile, then enter the URL of API, Then Select the Body, and in that select the form-data option, Finally select parameter type as File as shown in the screen below.
Now, select the excel file and click on the send button, and you can see we get a successful response as shown on the screen below.
Let's check our database table, and you can see all the records of the excel sheet are inserted in the table successfully.
SELECT [Student_Id]
      ,[RollNo]
      ,[EnrollmentNo]
      ,[Name]
      ,[Branch]
      ,[University]
  FROM [dbCodingvila].[dbo].[Students]
Summary
In this article, we learned how to create a WEB API to read the Excel file and insert the records into the database.
You can contact at info.codingvila@gmail.com, if you want source code or need any live support.
Price for Source Code: $21
Price for Live Support: $18 / hour


