In this article, I will show how to convert HTML into PDF in angular 12 as well as angular 11. I will also explain ways to create new angular applications as well as ways to install packages using PowerShell command for export pdf in angular application.
While you working with any web/windows software application sometimes at the time of reporting you need some advanced functionality like auto export, multiple exports options such as an export report with PDF, DOC, XLSX, XLS, CSV, RPT, and many other options. Sometimes it is necessary to merge multiple exported documents into a single document that you exported as per the client's need.
PDF stands for Portable Document Format, used to share information in the form of documents. PDF files are more secure than any other formats as the data cannot be changed after it is created. Moreover, the PDF files can be shared and printed as a hard copy. Today, almost every application has the feature to download or export PDF files from different types of data. A user can download invoices, bills, articles, reports, etc. As a portable document, we can keep it offline for later consumption instead of viewing the same detail using the network.
Today I got a new requirement where I have to export HTML content into PDF with the exact user interface available in HTML. First, I tried this from the backend using iTextsharp library, but iTextsharp library provided limited features like supporting only basic CSS and colors as well as not supporting curves in the lines and other CSS properties. Finally, I decided that I will archive this requirement from the frontend and this works for me. Please read the whole article step by step so you can understand the given explanation and this article can be helpful to you.
In my previous example, I explained How to merge multiple pdf files into a single pdf using itextsharp in c# and angular crud example with web api as well as some more interesting articles on angular that you might like to read.
Implementation
Let's create a new angular application and implement export to pdf functionality.
Now, first, we have to install angular CLI into our system, if you already installed angular CLI into your system then you can skip this step.
To, install angular CLI open package manager console or command prompt and type the below command, and press enter.
npm install -g @angular/CLI
NOTE: If you facing any issue related to npm then you have to download and install the active LTS, or maintenance the LTS version of Node.js.
If you are running an older version of angular and wants to update your angular application with the latest version of angular you can use the following command:
ng update @angular/core @angular/cli --force
Now, we have to create a new angular project.
Create Angular Application
To, Create a new angular project open package manager console from API Project, write the following command, and hit enter.
ng new ExportPDF
Here, ExportPDF is the name of our Angular project.
Now, we have to create a component into the created Angular project, for that first we have to change the directory and move to the Angular project, So open the package manager console from your WEB API project and write the following command.
cd NameofYourAngulerProject
Here, the Name of our angular project is ExportPDF so you have to write the command as shown below and hit enter.
cd ExportPDF
Next, we have to install a few library packages that are required to convert or export the HTML content into a PDF file.
npm install jspdf
npm install html2canvas
Update App Component Template
Next, we have to update out HTML content, So open app.component.html file and write the following code in that file:
<link rel="stylesheet" href="https://maxcdn.bootstrapcdn.com/bootstrap/3.4.1/css/bootstrap.min.css">
<script src="https://ajax.googleapis.com/ajax/libs/jquery/3.5.1/jquery.min.js"></script>
<script src="https://maxcdn.bootstrapcdn.com/bootstrap/3.4.1/js/bootstrap.min.js"></script>

<div class="container">
  <div>
    <input type="button" class="btn btn-primary" value="Convert" (click)="convetToPDF()" />
  </div>
  <hr />
  <div id="contentToConvert">
    <div class="jumbotron">
      <h1>Codingvila PDF Export Example</h1>
      <p>Codingvila is a educational platform developed to help programmers/beginner by providing articles and blogs on web and software development as well as also for students to provide them free final year academic projects in various technology.</p>
    </div>
    <hr />
    <table class="table table-bordered">
      <thead>
        <tr>
          <th>Firstname</th>
          <th>Lastname</th>
          <th>Email</th>
        </tr>
      </thead>
      <tbody>
        <tr>
          <td>Nikunj</td>
          <td>Satasiya</td>
          <td>nikunj@example.com</td>
        </tr>
        <tr>
          <td>Hiren</td>
          <td>Dobariya</td>
          <td>hiren@example.com</td>
        </tr>
        <tr>
          <td>July</td>
          <td>Dooley</td>
          <td>july@example.com</td>
        </tr>
      </tbody>
    </table>
    <hr />
  </div>
</div>
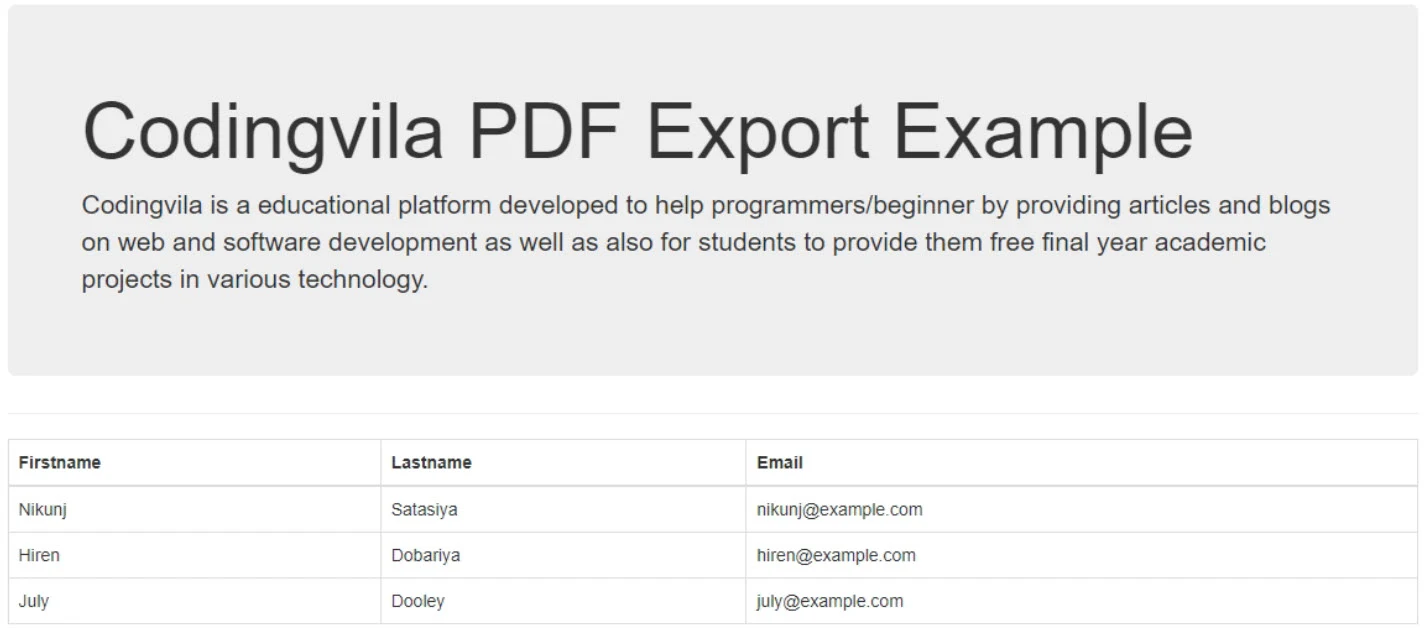
As you can see in the code above, here we have included and files of bootstrap CSS as well as the script for jquery. Then we have created an HTML button and created a click event of that button and called the convetToPDF function on click event. Then we created a simple paragraph with plain text as well as one bootstrap table with a few sample records.
Update app.component.ts file
Now, We have to update the app.component.ts file to perform the required operation, So you need t open the app.component.ts file and update it with the given code:
import { Component, OnInit, ElementRef, ViewChild } from '@angular/core';
import * as jspdf from 'jspdf';
import html2canvas from 'html2canvas';

@Component({
  selector: 'app-root',
  templateUrl: './app.component.html',
  styleUrls: ['./app.component.css']
})
export class AppComponent {
  title = 'ExportPDF';
  public convetToPDF() {
    var data = document.getElementById('contentToConvert');
    var width = document.getElementById('contentToConvert').offsetWidth;
    html2canvas(data).then(canvas => {
      var imgWidth = 208;
      var imgHeight = canvas.height * imgWidth / canvas.width;
      const contentDataURL = canvas.toDataURL('image/png')
      let pdf = new jspdf.jsPDF('p', 'mm', 'a4');
      var position = 5;
      pdf.addImage(contentDataURL, 'PNG', 5, position, imgWidth-7, imgHeight)
      pdf.save('newPDF.pdf');
    });
  }
}
As you can see in the above code, At the top we have imported library jspdf and html2canvas and below that, we have a method which we will call on click event of a button from the HTML file, Within the method, we have written the code for getting the HTML content based on the id property of HTML tag and export it to the pdf file.
Now, you just need to run your project by using the following command:
ng s --open
When a user clicks on the Convert button, a click event of the convert button will get executed and the whole HTML code convert into an image, and then using that one PDF file will generate and gets downloaded on the client's browser.
Output:
Summary:
In this article, we learned, how to convert HTML code into pdf file as well as the way to convert HTML code into an image and export that image into a PDF file. Here we also learned a way to create a new angular application as well as a way to install a new packages library into the angular project, which might help beginners.


